
Hi Devs,
This post is part of a series of articles introducing Node.js.
- Part 1 : the basics
- Part 2 : NPM
- Part 3 : Express.js (This tutorial)
- Part 4 : Productivity Tools
In this post, we will see how to easily build a ready-to-use web application using Node.js and the Express framework.
What is Express.js ?
Express.js is a framework that take care of much of the boilerplate of web application development. It also leverages the concept of middleware. With this framework, you can easily handle some common tasks like serving static files or handling routing logic. It also rules, via the express-generator, a structure for your project.
A simple Express application
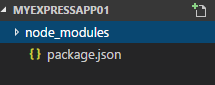
We have first to install Express within our project like any other NPM package. Create a new folder for your project and type the following commands :
cd myexpressapp01
npm init --yes
npm install express --save

This will prepare your Node project and install express and all its dependencies. If you take a look in the node_modules folder, you will see a lot of external modules have been installed.
in a index.js file, copy/paste the following code snippet:
 // Using the Express Framework
 const express = require('express');
 // Instantiate an Express app
 let app = express();
 // Define the (only) HTTP request handler
 app.get('/', (req, res, next) => { res.send("Hello World!"); });
 // The HTTP server listens on port 3000
 const port = 3000;
 app.listen(port, () => {
   // A callback function executed when the server IS actually listening
   console.log("Now listening on port " + port);
  });
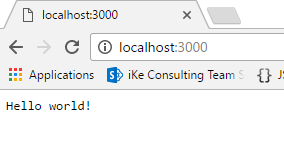
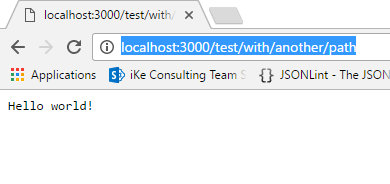
The code above runs a simple HTTP server listening on port 3000, basically the same thing as the server sample in my previous post
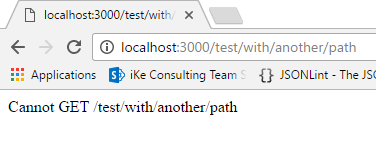
Part 1: the basics. However, there is a slight difference when you try to reach any URL under localhost:3000 other than the root.
Basic Node App
Express App
You probably noticed in the code above that we specified the path of the HTTP handler
...
app.get('/', (req, res, next) => {
  ...
});
...
It is actually the basic routing capability of Express, you can easily specify at which route your handlers should respond.
Routing with Express
Routing needs can be met very easily with Express with a simple construct rule :
app.get('/my/route', (req, res) => {
  // Process the request and send a response
});
where
- app is an instance of the Express application
- **get **is the HTTP verb, it can be replaced by the standard HTTP verbs ( get, post, put, patch, delete, ...)
- **'/my/route' **is the route (the path) at which the handler will be called. The route value can be a regex for more flexible routes. Express can also extract variable parts of the route as arguments.
- (req, res) => is the callback function to process the request and send the response (note: here written as a ES2015 arrow function aka lambda statement in TypeScript or C#, it could have been written ** function(req,res) **).
Here is an example of a server that handle get and post requests for a (very very) basic login mechanism based on IP Address
// Using the Express Framework
const express = require('express');
// Instantiate an Express app
let app = express();
let loginRegistry = {};
const credentialsDatabase = {
"YPCode": "password",
"Foo": "bar"
};
// Define the (only) HTTP request handler
app.get('/', (req, res) => {
res.send("Home page");
});
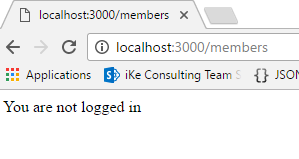
app.get('/members', (req, res) => {
let address = req.connection.remoteAddress;
console.log("Trying to access members zone from " + address);
if (!loginRegistry[address]) {
res.send("You are not logged in");
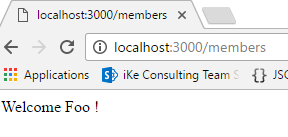
} else {
let loggedInAs = loginRegistry[address];
res.send(`Welcome ${loggedInAs} !`);
}
});
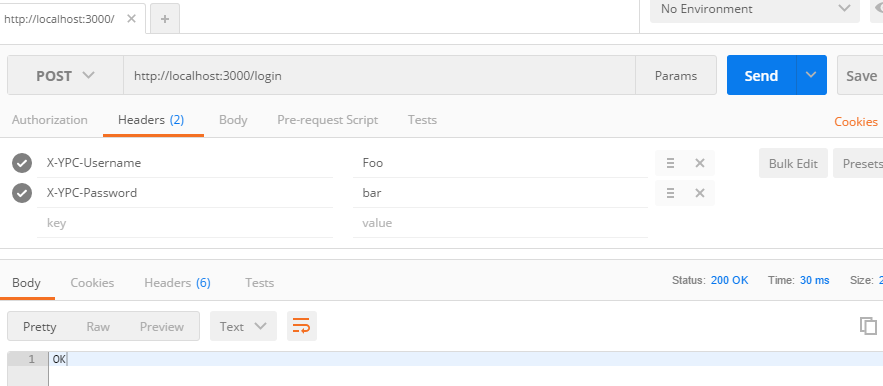
app.post('/login', (req, res) => {
// Will be called only with a HTTP Post
let address = req.connection.remoteAddress;
// Check credentials
let username = req.headers["x-ypc-username"];
let pwd = req.headers["x-ypc-password"];
console.log(`Username=${username} Password=${pwd}`);
if (!credentialsDatabase[username] || credentialsDatabase[username] !== pwd) {
// Return forbidden if credentials are not correct
res.sendStatus(403);
return;
}
console.log(`Login from ${address} as ${username}`);
loginRegistry[address] = username;
res.sendStatus(200);
});
// The HTTP server listens on port 3000
const port = 3000;
app.listen(port, () => {
// A callback function executed when the server IS actually listening
console.log("Now listening on port " + port);
});
Call to /members before Login
Call to /members after login
The login is handled by a POST HTTP request (here sent with Postman)
[^] the above implementation SHOULD NOT be used for production applications over the Internet, with IP translation and rerouting when going through network boundaries. An IP Address cannot be used to identify a unique user.
Modular routing
With a larger application, you will probably not want to have all the handlers and routes in the same source file. Express offers an handy way to handle routes within dedicated modules using the Router object.
Add a new file to your project and name it myroutes**.js**. Paste the following snippet in it.
const express = require('express');
let router = express.Router();
router.get('/', (req, res) => {
  console.log("spot 1");
  res.send("You reached the spot 1");
});
router.get('/sub', (req, res) => {
  console.log("spot 2");
  res.send("You reached the spot 2");
});
router.get('/sub/sub2', (req, res) => {
  console.log("spot 3");
  res.send("You reached the spot 3");
});
exports.myroute = router;
In the code above, we defined a module with a set of relative routes, in our index.js file, we will now reference this module and tell the application that we want to use this module only under a certain path.
// Using the Express Framework
const express = require('express');
// Instantiate an Express app
let app = express();
// References our module
var myroutes = require('./myroutes');
// Use this module under the path /my
app.use('/my', myroutes.myroute);
// The HTTP server listens on port 3000
const port = 3000;
app.listen(port, () => {
  // A callback function executed when the server IS actually listening
  console.log("Now listening on port " + port);
});
If you are familiar with ASP.NET development and IIS, we are basically implementing a virtual path (or Area in ASP.NET MVC) We will be able to reach the handlers through the routes :
- /my
- /my/sub
- /my/sub/sub2
Serving static files
All the things we saw so far can be really interesting when we want to develop our custom API endpoints or some routing logic. However, in many cases, we would want our web server to simply serve files and we don't want to rewrite the code to handle such a common task. Obviously, Express.js will help us here with a single line of code.
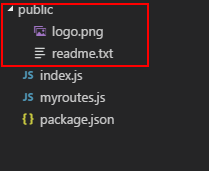
First we need to create the folder that contains the files to serve. Create, for instance, a folder named public (the name doesn't really matter) and put whatever content in it. In your index.js file, add the following line after the first occurence of _app.use(... _: app.use(express.static('public');
We can then try to get the files under the localhost root :

We can also make it a kind of IIS virtual directory using the following instruction instead : app.use('/content', express.static('public'));
The full index.js file looks like :
// Using the Express Framework
const express = require('express');
// Instantiate an Express app
let app = express();
var myroutes = require('./myroutes');
app.use('/my', myroutes.myroute);
app.use('/content', express.static('public'));
// The HTTP server listens on port 3000
const port = 3000;
app.listen(port, () => {
  // A callback function executed when the server IS actually listening
  console.log("Now listening on port " + port);
});
Middleware
In the 2 sections above, you propably noticed a syntax that we used : app.use(...); It is actually how we can tell Express to "use a middleware". Basically, it means adding a step to the HTTP request processing flow. As its name imply, a middleware is a piece of software occuring in the middle of a process flow. The middleware can prepare, massage, compute or aggregate (...) data from the HTTP request in order to meet the functional needs and send the appropriate HTTP response.
Each middleware, according to their purpose, might extend the request data, prepare or add data to the response, and decide to actually flush out the response.
If you are familiar with ASP.NET development, it is quite similar the HTTP Modules and HTTP Handlers or ASP.NET MVC Filters.

As you might have understood, the order in which we specify the middleware DOES MATTER, because, we might need at some point an information a previous middleware has computed. At the end of the flow, if no middleware has flushed the response, the HTTP request will remain unresponded until a timeout (issued by the request sender) occurs.
In the previous examples, we used a middleware that handles the routing logic, or the static file serving capabilities. In some cases, we might want to write our custom middleware. Imagine, we want to check all incoming requests for a specific header responsible for the authentication. Before the very first app.use(...), add the following lines
app.use((req, res, next) => {
  if (req.headers\["x-auth-token"\] == "foobar") {
    next();
    return;
  }
  // The auth token is not found, respond with forbidden
  res.sendStatus(403);
});
This code will be executed before anything else at each incoming HTTP request. Let's try it with Postman


If the header x-auth-token matches the value "foobar", then the next step of the processing flow is called (executing the next() callback), if the value of the header doesn't match, a 403 Forbidden HTTP code is returned. It is also a good habit to always have a catch-all middleware that will be responsible for responding to all HTTP requests that has not been responded by any of the previous middleware. After all the other app.use() instructions, add the following lines:
app.use((req, res) => {
 // Catch all
 res.send("THIS IS THE CATCH ALL PAGE");
});
This middleware will simply respond with a dummy message, but the logic here could be implemented as a redirection to a 404 Not found page.
A structured project with Express Generator
Express.js can make our work even simpler by generating a well structured project and also proposes to give the request processing to a view engine to generate views with dynamic data. The first thing to do is to install the express generator through NPM:
npm install express-generator -g
# (Note: the -g switch will install the NPM package globally (in your user software directory)
Once installed, you can use this tool with the following command-line
 > expressapp
 > cd expressapp && npm install run the app:
 > SET DEBUG=expressapp:* & npm start
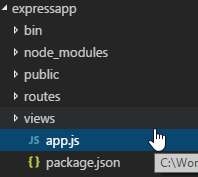 a directory named "expressapp" has been created with all the boilerplate code source, dependency references and project structure.
To install the dependencies, type the following commands:
a directory named "expressapp" has been created with all the boilerplate code source, dependency references and project structure.
To install the dependencies, type the following commands:
cd expressapp
npm install
Your project has now the following structure :
- public: a folder that contains all the files to serve ( typically, CSS, JS, images and so on...)
- node_modules: like any Node project, it has a directory for the installed modules
- routes: a folder dedicated to contain the JS files for each main route.
- views: a folder dedicated to contain the view files (HTML or other view format like jade).
- app.js is the main source code file of our app and contains already generated code that handles static file serving, some predefined routes (to be customized) and references some utility like body parser, cookie parser, a logger,...
- bin: is the folder that contains the startup point of the application (it comes from the Unix world). it contains a single www file which is actually a javascript file that will be executed by the node runtime. It actually handles some environment configuration. (really useful when multiple runtime environments (Dev, Test, Prod,...)
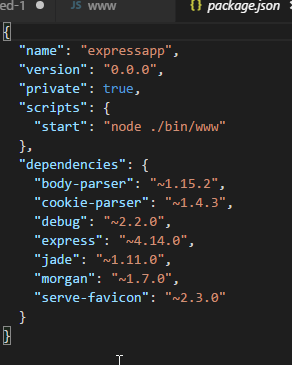
- package.json the package.json file of our project (cf Part 2) preconfigured with a start command
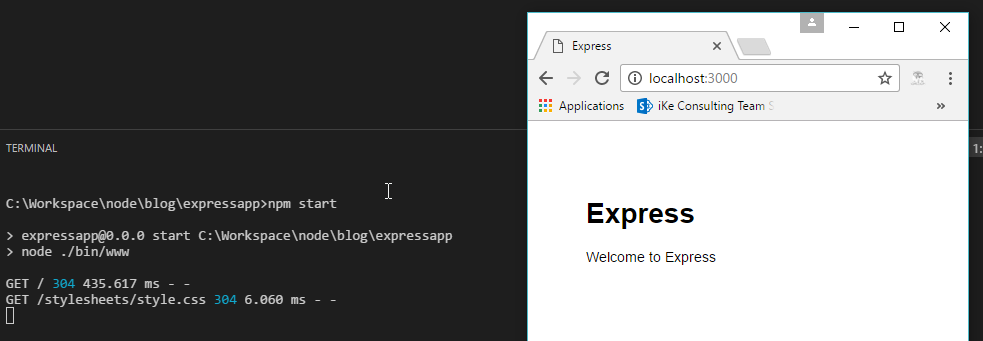
This application is ready-to-use and can already be executed:
npm start
Try to access http://localhost:3000 from your browser, and you will see some HTTP logging in the terminal.
A quick word about Jade
Express.js allow efficient view rendering through view engines, different engines exist with each their own syntax:
- Jade (the latest version has been renamed to pug) : Space-sensitive easy HTML rendering engine. It is the default engine in Express.
- Mustache : Allows to enrich static HTML with dynamic data through the Mustache syntax .
{{ myDynamicData }} - EJS : Alike ASP.NET MVC Razor with JavaScript
To test the view engine in Express, we will use the default Jade. In the routes folder, copy the index.js file to a new file named contact.js and replace the router.get... line by the following:
...
router.get('/', function(req, res, next) {
  res.render('contact', {
    title: 'Contact',
    message:'Do not hesitate to contact us!',
    email:'contact AT ike DOT lu'
  });
});
...
Notice here above, that we call the render() function instead of the send() function we saw earlier. We render the 'contact' view with the data passed as the second argument. In the views folder, create a contact.jade file and put the following content in it:
// Use the layout.jade template as the layout page
extends layout
  // Put the current page content within the block (placeholder) named 'content'
  block content
    // Add a H1 element containing the value of the title variable
    h1= title
      // Add a H2 element with a inner text containing the value of the message variable
      h2 Hey, #{message}
      // Add a DIV element with some text
      div
        You can contact us via
        // Add a A element within the parent DIV element
        a(href="mailto:#{email}") this address
To handle the contact route, we need to modifiy the app.js file. At line 10, insert the line
 // Reference our contact route module
 var contact = require('./routes/contact');
and insert the following at line 28
// Use our contact route module at main route /contact
app.use('/contact', contact);
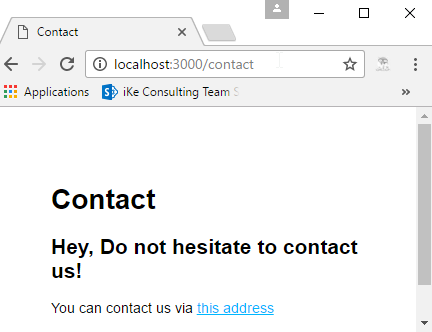
You can execute npm start and try to reach the url http://localhost:3000/contact in your browser
For a reference documentation about Jade syntax, please refer to here Here we go for Express.js, I hope it will give you a good overview of what can be achieved with this great framework. Leave your comments and feedback !
Cheers
Yannick