
Hi guys, This post is part of a series of articles introducing Node.js.
- Part 1 : the basics
- Part 2 : NPM
- Part 3 : Express.js
- Part 4 : Productivity Tools (This tutorial)
For a development technology to be adopted in the professional world, it has to be efficient by its performances as well as by its ease of development through an efficient tooling. Since Node.js is an Open-source technology, a lot of different tools can be used to help us develop applications. In this post, we will focus on the following points:
- Editing code efficiently using Visual Studio Code
- Writing syntax error-proof and structured code using TypeScript
- Debugging JavaScript code using Visual Studio Code
A portable code editor: Visual Studio Code

In 2015, Microsoft released a code editor named Visual Studio Code. It is Cross-platform, Open-source and free. It supports a lot of languages and is especially well suited for JavaScript and Node applications. It is available for Windows, Linux and MacOSX. It is particularly welcome to develop Node.js applications that will run on these different platforms. It comes with the following features:
- A folder tree explorer
- Advanced file and file content search capabilities
- A git integration
- An integrated debugger
- An integrated terminal (console)
- Extensibility via an Extensions gallery
You can download it on the official site. Once installed, you can launch it either directly clicking its icon or contextually.
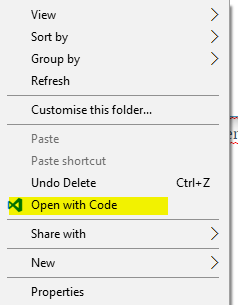
In Windows file explorer, you can right click in the folder content area and select "Open with code".
It will open VS Code and set the current folder as the workspace. From a CLI, you can navigate through your workspace folder and execute the code command with "." as the argument
> cd \\workspaces\\node\\app
> code .
It also offers a lot of productivity shortcuts, check this out for a complete reference for various platforms. Let's prepare our Node.js project using VS Code.
- Open code in your workspace folder
- Open the integrated terminal (Ctrl+`) (note: check the reference for the shortcut according to your locale)
- Prepare a new Express app > express myapp > cd myapp > npm install
A typed flavour of JavaScript: TypeScript

One of the strengths of JavaScript is that it is weakly typed and it is interpreted (not compiled). It is very dynamic, so we can do a lot of things and write some small scripts straight to the point. However, when we want to write bigger and more complex applications, we would want to make it more structured with different concern layers, etc...
In these cases, we can't afford to run every single line of code we write just to make sure it isn't buggy. TypeScript will help us here, it is an overset of JavaScript that will be transpiled into plain javascript. It allows to code in a strongly typed manner, and let us have efficient tooling like code spell checking and intellisense. For more information about TypeScript, you can check my post about TypeScript or the official TypeScript reference site.
Develop Node.js apps with TypeScript
First, we will install the typescript compiler tsc:
> npm install typescript -g
# At the time of this writing, TypeScript is at version 2.1.4
In order to ensure compile-time code checking with Node.js, we need to install the typings information for Node:
> npm install @types/node --save-dev
> npm install @types/express --save-dev
As an exercise, we will rewrite the app.js file, rename it app.old.js and create a new app.ts file. Let's write it in a Object Oriented and typed way:
// Import the modules
import * as express from "express";
import * as path from "path";
import * as favicon from "serve-favicon";
import * as logger from "morgan";
import * as cookieParser from "cookie-parser";
import * as bodyParser from "body-parser";
import * as indexRoute from "./routes/index";
// To avoid TypeScript compiler error
declare var __dirname;
export class Server {
  private app: express.Application;
  private initViewEngine() : void {
    this.app.set('views', path.join(__dirname, 'views'));
    this.app.set('view engine', 'jade');
  }

  private initMiddleware() : void {
    // uncomment after placing your favicon in /public
    //app.use(favicon(path.join(__dirname, 'public', 'favicon.ico')));
    this.app.use(logger('dev'));
    this.app.use(bodyParser.json());
    this.app.use(bodyParser.urlencoded({ extended: false }));
    this.app.use(cookieParser());
    this.app.use(express.static(path.join(\_\_dirname, 'public')));
  }

  private initRouteHandlers() : void {
    this.app.use('/', indexRoute);
  }

  private initErrorHandling():void {
    // catch 404 and forward to error handler
    this.app.use(function(req, res, next) {
      var err = new Error('Not Found');
      (<any>err).status = 404;
      next(err);
    });

    // error handler

    this.app.use(function(err, req, res, next) {
      // set locals, only providing error in development
      res.locals.message = err.message;
      res.locals.error = req.app.get('env') === 'development' ? err : {};
      // render the error page
      res.status(err.status || 500);
      res.render('error');
    });
  }

  public static getAppInstance() : express.Application {
    return new Server().app;
  }

  constructor() {
    this.app = express();
    this.initViewEngine();
    this.initMiddleware();
    this.initRouteHandlers();
    this.initErrorHandling();
  }
}
Basically, the code above is just a TypeScript flavor of the code from the initially generated app.js file. It is absolutely not necessary since TypeScript is a superset of JavaScript, plain JavaScript remains totally legal in TypeScript, it is why the other plain JS files work just fine here. The purpose of rewriting the file above is just to show what a basic Express server will look like in TypeScript.
Personally, I prefer not to mix up plain JS and TS, but it is just a very subjective point. To make the code above work, we have to change a little thing in the /bin/www file: Replace the line #5 by the following : var app = require('../app').Server.getAppInstance();
In order to compile TypeScript code with VS Code, we need the configure the TypeScript compiling for our project as well as the build action of Visual Studio Code.
Create a new file named tsconfig.json and put the following content into it:
 {
   "compilerOptions": {
     "target": "es5",
     "module": "commonjs",
     "sourceMap": true,
     "allowJs": true }
  }
Notice that VS Code is smart enough to propose intellisense based on the name of the file. We need now to configure the build action. To do that press Ctrl+Shift+P to get the Palette prompt: start typing "configure task" and select configure Task Runner, then select the TypeScript - Watch mode choice.
This will generate a task.json file under the .vscode folder.
{
  // See https://go.microsoft.com/fwlink/?LinkId=733558
  // for the documentation about the tasks.json format
  "version": "0.1.0",
  "command": "tsc",
  "isShellCommand": true,
  "args": ["-w", "-p", "."],
  "showOutput": "silent",
  "isWatching": true,
  "problemMatcher": "$tsc-watch"
}
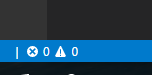
We configured the TypeScript compiler to compile all .ts files whenever they are saved. However, we need to start the build task by pressing Ctrl+Shift+B. In the left bottom corner of VSCode, you will see some reaction.

If the compilation fails, this bar will display the number of errors and warnings. By clicking it, you will see the list of errors.
Debugging your application
To debug your application, you can hit the F5 button. If it is the first time, VS Code will ask you to configure the launch task, select the Node.js environment, a launch.json file will be generated within the .vscode.
Starting from now, hitting the F5 button will launch and debug the application, you can toggle breakpoints and use some debugging capability.
Hope you will appreciate using VS code for developping Node applications. Leave your comments and feedback
Cheers,
Yannick