
Hi guys,
First of all, I want to thank you all for the massive interest for the Site Designs Studio. I was sure it can be a useful tool but I didn't expect such an amount of reactions. Thank you very much !
Yesterday, I released the source code of the Site Designs Studio WebPart in version 1.0. You can check out the related post here.
[EDIT] The latest version (1.1) of Site Designs Studio, is now maintained under a PnP repository here
Since it is a tool mainly targeting business end-users, I wanted to provide a way to install the WebPart that will not involve technical knowledge for compiling, bundling, etc... Actually, you will need to type a few commands in PowerShell, but I will try to explain them accurately enough so no amiguities would persist.
The prerequisites
- Site Designs is a feature only available on SharePoint Online currently, this tool is then not suitable for on-premises setup
- You must be a tenant administrator or be a friend of your tenant administrator ;)
- Office 365 CDN must be enabled
- You will need the SharePoint Online Management Shell installed on your computer to setup the CDN if not already done.
- The installer is a PowerShell script relying on PnP PowerShell, you will also need to install this .msi on your computer.
- Download the Install archive
Setup the Office 365 CDN
Once the SPO Management Shell is installed, launch it. In the console, type the following commands
# Replace "yourtenant" by the name of your tenant
Connect-SPOService -Url https://yourtenant-admin.sharepoint.com
You will be invited to enter your tenant administrator credentials Get the status of your CDN
Get-SPOTenantCdnEnabled -CdnType Public
Get-SPOTenantCdnOrigins -CdnType Public
Get-SPOTenantCdnPolicies -CdnType Public
#Value
#-----
#True
Get-SPOTenantCdnOrigins -CdnType Public */MASTERPAGE */STYLE LIBRARY */CLIENTSIDEASSETS
Get-SPOTenantCdnPolicies -CdnType Public
#Key Value
#--- -----
#IncludeFileExtensions CSS,EOT,GIF,ICO,JPEG,JPG,JS,MAP,PNG,SVG,TTF,WOFF
#ExcludeRestrictedSiteClassifications
#ExcludeIfNoScriptDisabled False
If you see True as the return of the first command, and you see, at least, */CLIENTSIDEASSETS as the result of the second command, the CDN is properly configured to install our WebPart and you can jump directly to the next section. Otherwise, we have to use a few more commands:
# Enable the CDN
Set-SPOTenantCdnEnabled -CdnType Public
# Check the CDN status
Get-SPOTenantCdnOrigins -CdnType Public
After executing the first command (Set-SPOTenantCdnEnabled), it might will take about 15 minutes to be configured, you can check the setup status with the second command (Get-SPOTenantCdnOrigins). As long as you see the mention "(configuration pending)", the setup is not complete, re-execute the second command after 15 minutes to check if this mention disappeared. When it did, we're good to go.
Install the WebPart
Extract the content of the package.zip archive, in the extracted folder, open a PowerShell console. If you are on Windows 10, you can do as in the exhibit below
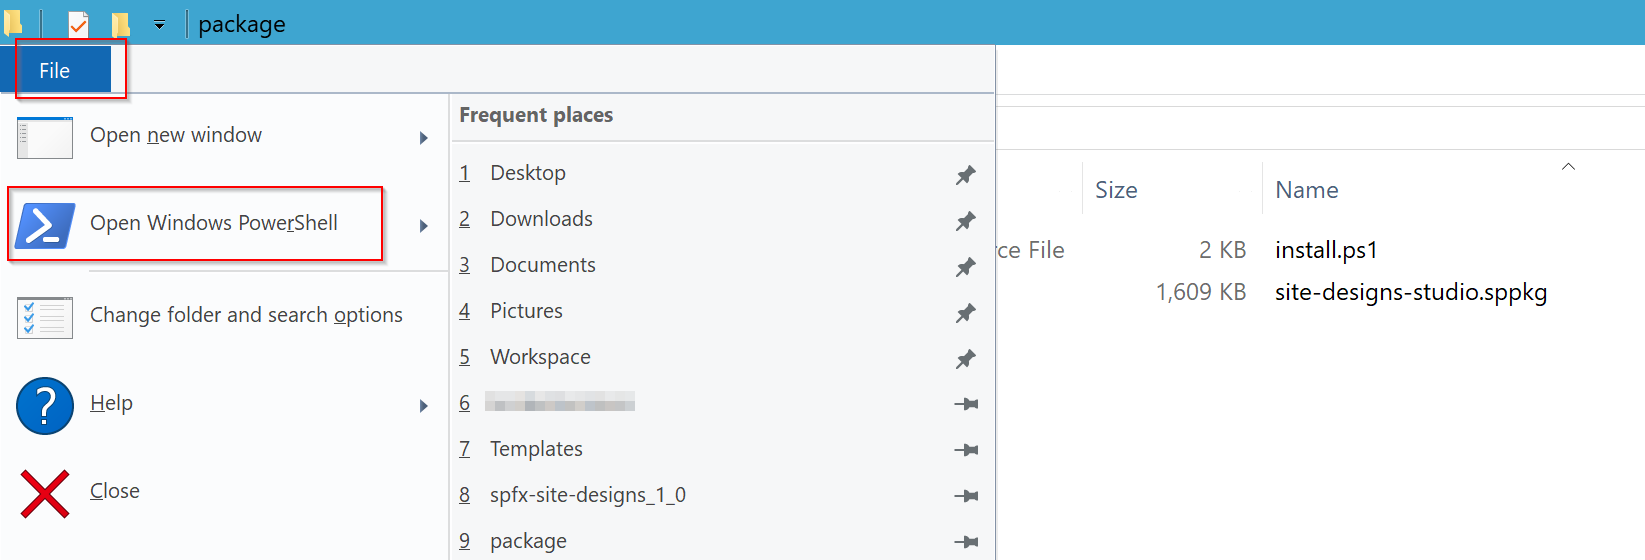
Or you can change directory directly in any PowerShell console (cd \path\to\folder) Once in the PowerShell console, just type the following command
# Replace yourtenant by the name of your tenant # Replace yoursite by your site name
# e.g. https://contoso.sharepoint.com/sites/MyTeamSite/
.\install.ps1 -Url https://yourtenant.sharepoint.com/sites/yoursite
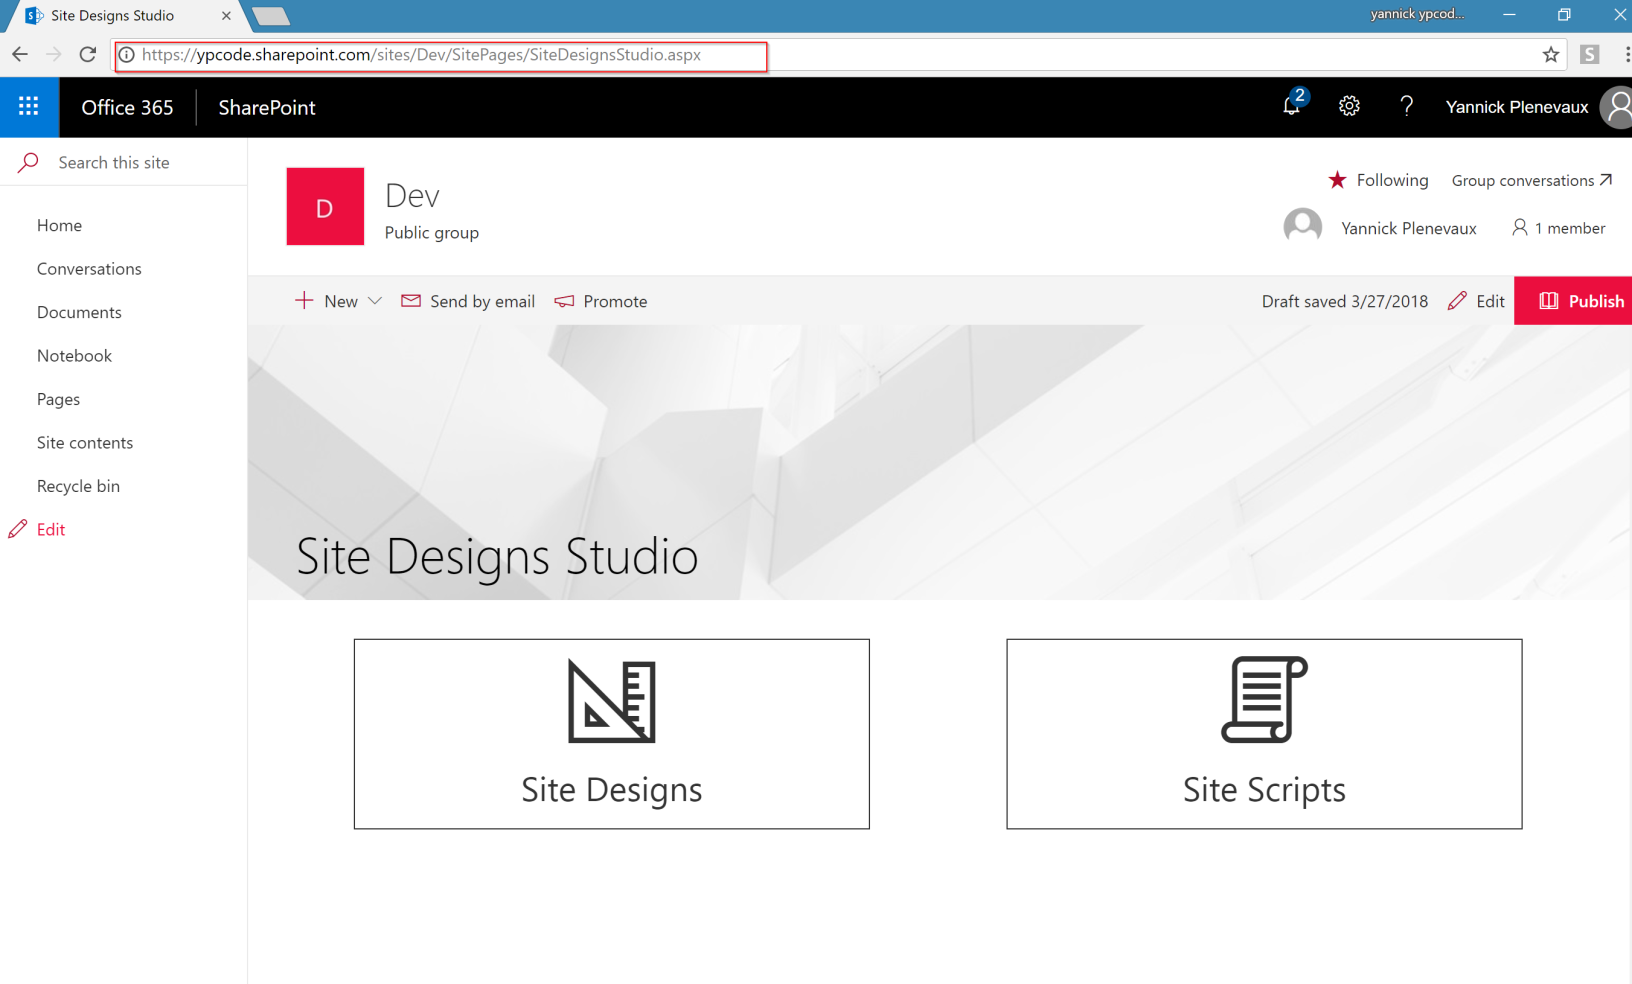
You will be prompted for credentials, here enter again the tenant administrator credentials. Go now to https://yourtenant.sharepoint.com/sites/yoursite/SitePages/SiteDesignsStudio.aspx

That's it ! Enjoy !
You can now try the WebPart and start creating your own Site Designs and Site Scripts !
Hope it will be useful,
Cheers,
Yannick