
Hi Microsoft 365 devs !
This is the Part II of my post series about Microsoft Graph Subscriptions. If you missed Part I and you want to learn about the fundamentals of Microsoft Graph, it is this way !.
In Part I, we discovered the concepts of Subscriptions, how to create a subscription and how to implement a very basic endpoint using Azure Functions from Azure Portal. In this Part II, we will
- See what professional tools we can use to develop an Azure Function
- Write some boilerplate code in order to be efficient when developing Microsoft Graph Subscriptions endpoints
Developing Azure Function like a Pro
In Part I, we wrote a very simple Azure Function on top of NodeJS runtime (we wrote JavaScript) and we did it directly from the Azure Portal. It is very useful to try out and experiment some concepts, but whenever you start real development, you want to be efficient, productive and write code you will be eager to maintain ! In this post I will be using Visual Studio Code and its wonderful Azure Function extension, you can also develop Azure Function with Visual Studio IDE or even with other editors, but it requires extra steps to setup your deployments. In this case, I will focus on development and deploy straight ahead, but one should probably keep in mind than on bigger projects, a better approach would be to use a deployment pipeline (CI/CD).
Some prerequisites
If you don't have Visual Studio Code, you can download it here. Today, we are going to write our Azure Function on Node.js runtime again. That means you will need to have Node.js installed on your computer. But this time, however, we will use TypeScript instead of plain JavaScript ! you will need to install globally the npm package azure-functions-core-tools
npm install -g azure-functions-core-tools
And in VS Code install the Azure Function extension, by default you can press Ctrl+P, and then type
ext install ms-azuretools.vscode-azurefunctionsPreview
(Or you can also search "Azure Functions" from the extension gallery and install it)
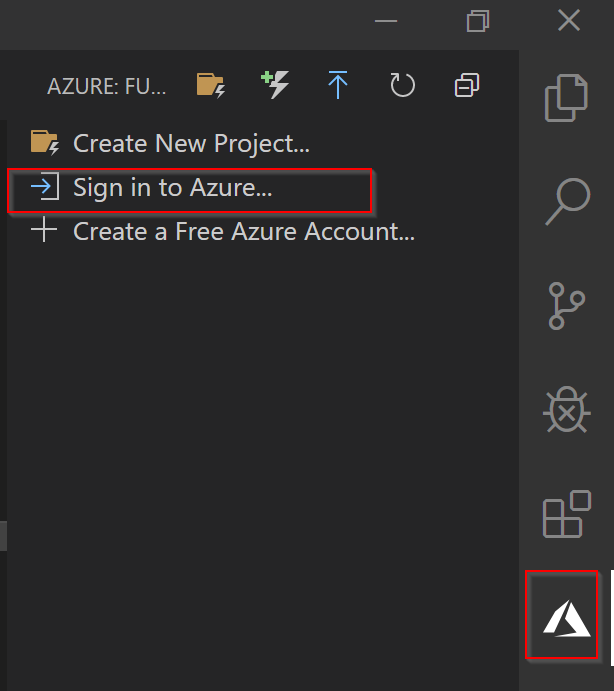
Once installed, you will get a new available tab in VS Code where you can sign in to your Azure Account and see all the Azure Functions you have access to. With these tools, we will not only write our Azure Functions in our code editor with all our preferred features, but also, we will be able to run the Azure Function locally on our computer during development time, it eases testing and debugging ! In order to do that, we will also need the .NET Core runtime.
Let's code (a bit)
Finally, we have all the prerequisites checked ! Now let's code ! We can start by creating a new project using the dedicated button "Create a new Project..." in our Azure Functions extension
- Select the folder of your new project
- Select "TypeScript" as the language
- Select "HTTP Trigger" as the first function template
- Call it whatever your like (e.g. Webhook)
- Select "Anonymous" as the authentication level
- Select the VS Code window to open in (doesn't matter here, it's up to you)
The extension scaffolds the project for us with a bunch of files.
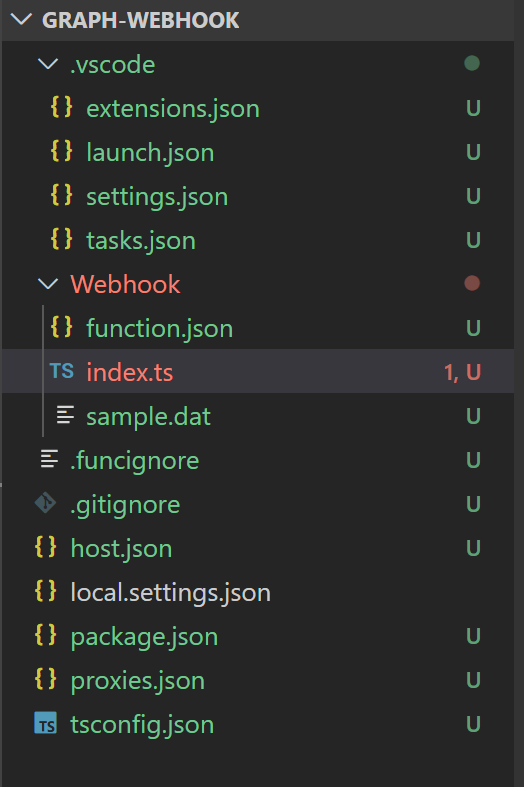
All VS Code, TypeScript, GIT, and basic Azure Functions settings have been created for us.
In the Webhook folder (named after the chosen Function name), you will find an index.ts file which is the code of our function.
If you open that file, you'll immediately notice that we have the typings that will make us way more efficient when editing the default code !
First, let's run it once to make sure everything is working properly...
so what should we do ?
Hey just hit F5 !
Damn... it was sooo easy !
Let's rewrite the basic Webhook implementation of Part I, but this time in a more efficient and clean way !
At the same level as the Webhook folder, let's create another folder entities and let's create a single file (for now) named INotification.ts, guess what it'll contain ?
export interface INotificationResourceData {
    id: string;
    "@odata.type": string;
    "@odata.id": string;
    "@odata.etag": string;
}

export interface INotification {
    subscriptionId: string;
    subscriptionExpirationDateTime: string;
    tenantId: string;
    changeType: string;
    clientState: string;
    resource: string;
    resourceData: INotificationResourceData;
}

export interface INotificationsPayload {
    value: INotification[];
}
We simply described the payload of notifications as TypeScript interfaces. With these interfaces added to our code, it becomes really simple, thanks to intellisense in VS Code, to write our implementation without switching to documentation every 2 minutes!
Let's implement the Webook more or less as it was in Part I
import { AzureFunction, Context, HttpRequest } from "@azure/functions"
import { INotificationsPayload } from "../entities/INotification";
const httpTrigger: AzureFunction = async function (context: Context, req: HttpRequest): Promise<void> {
context.log('HTTP trigger function processed a request.');
// Validate the subscription creation
if (req.query.validationToken) {
context.log('Validating new subscription...');
context.log('Validation token:');
context.log(req.query.validationToken);
context.res = {
headers: {
'Content-Type': 'text/plain'
},
body: req.query.validationToken
};
}
else {
context.log('Received new notification from Microsoft Graph...');
context.log('Notifications: ');
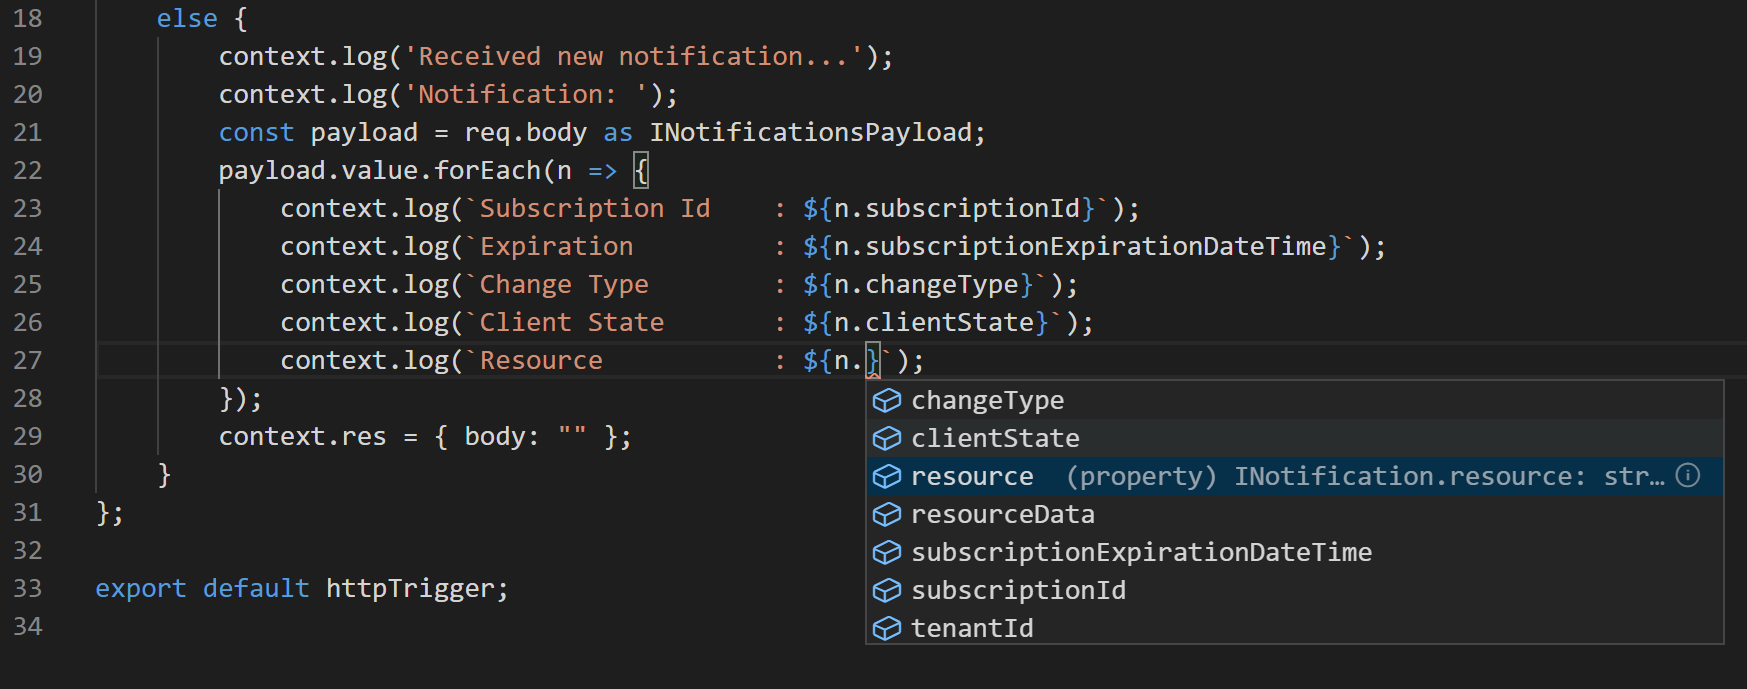
const payload = req.body as INotificationsPayload;
payload.value.forEach((n,i) => {
context.log(` Notification #${i} `);
context.log(`----------------------------------------------------------`);
context.log(`Subscription Id : ${n.subscriptionId}`);
context.log(`Expiration : ${n.subscriptionExpirationDateTime}`);
context.log(`Change Type : ${n.changeType}`);
context.log(`Client State : ${n.clientState}`);
context.log(`Resource : ${n.resource}`);
context.log(`Resource Data : ${n.resourceData}`);
context.log(`----------------------------------------------------------`);
});
context.res = { body: "" };
}
};
export default httpTrigger;
and deploy the Azure
Function with the Deploy to Function App... button of the VS Code Azure Function extension. If you don't have an existing compatible Function App on your Azure Subscription, you can easily create a new one from VS Code !
Once publish, you can even display the log stream in your VS Code. In order to do that you have to right-click the Azure function and click the "Start streaming logs" option

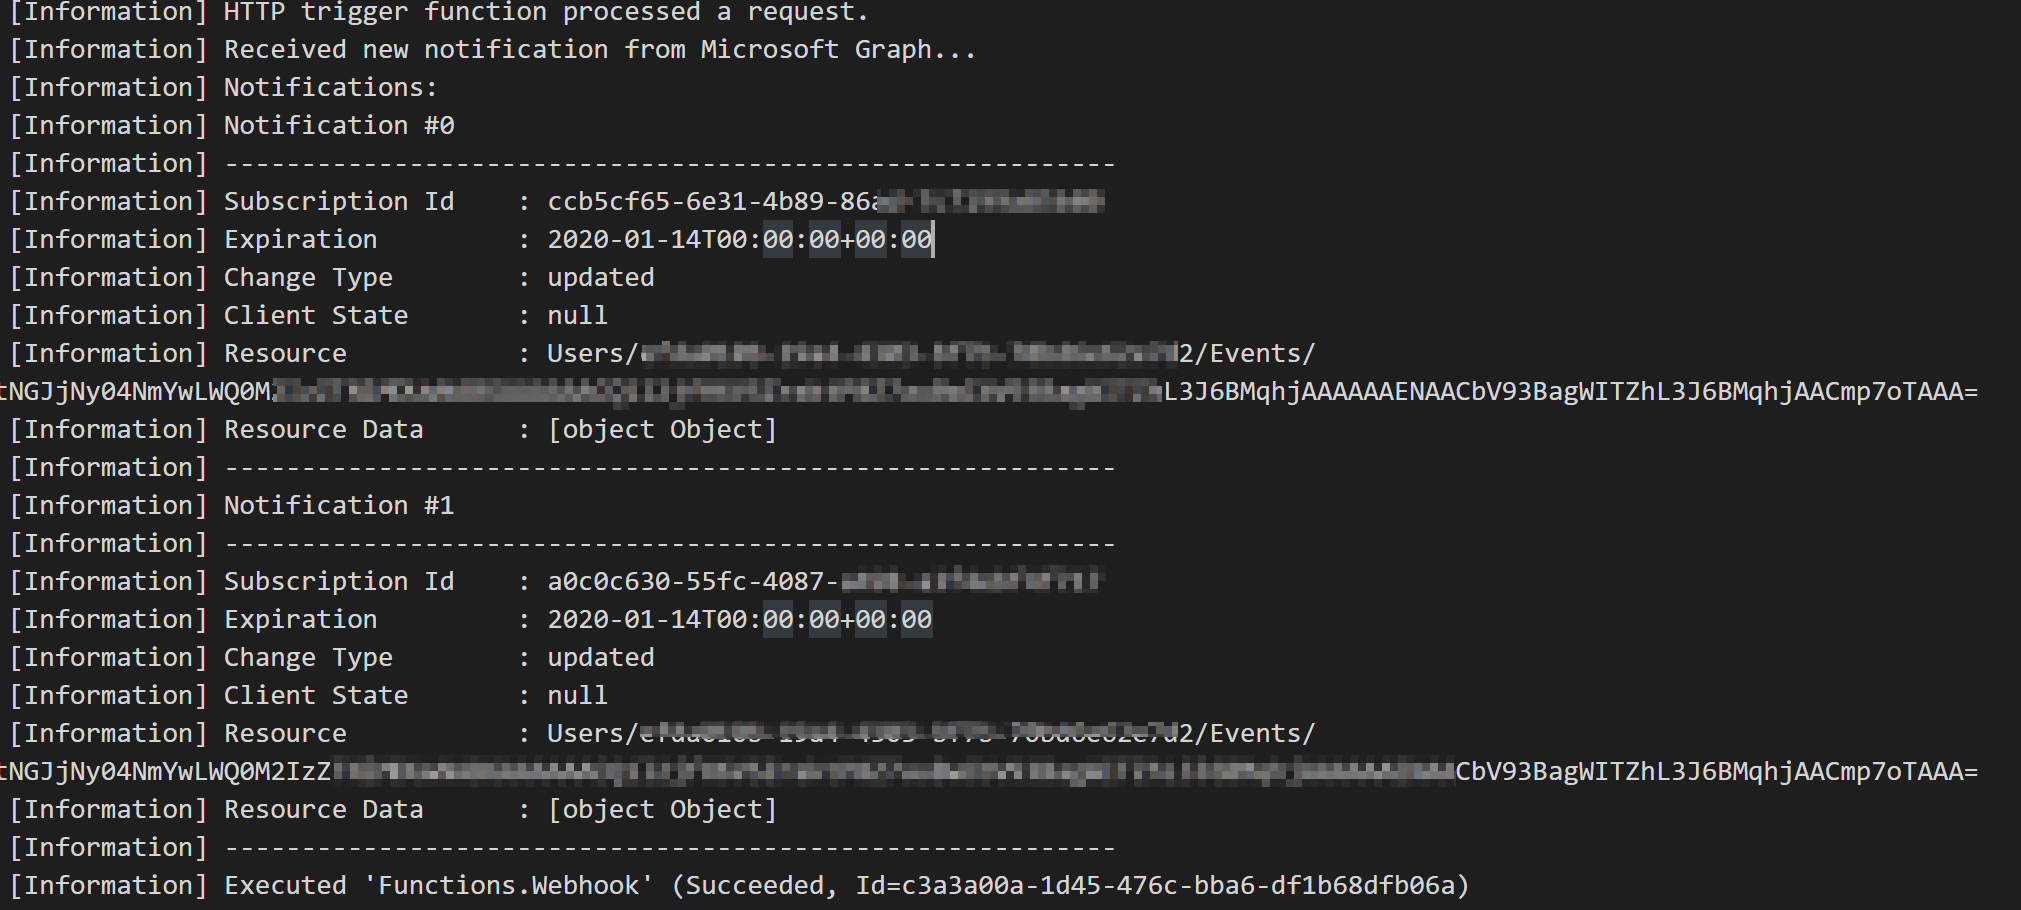
After that, let's create the subscription from Graph Explorer (see Part I). In my case, I created it twice, and when I create an event in my calendar, I can see in VS Code the notifications I receive in the same HTTP call, the notifications from various subscriptions are included.
That's all for Part II !
While I initially planned to cover a bit more in this Part II, I think it's already quite a few things here. The next thing I want to cover is handling subscriptions lifetime which can be quite long on its own, so I prefer to have a Part III dedicated to it. We will leverage multiple Azure Functions as well as PnP JS ! Stay tuned and see you soon here for Part III !
Cheers,
Yannick