
Hi Microsoft 365 devs,
In this blog post, I will show you how easy it is, thanks to the PnP provisioning engine, to ship a solution as a single package. All the dependencies (at least most of them for now) can be included in that package and thus significantly reduce the needs for a complex multi-steps setup procedure tackling several different administration areas across Azure, Office 365, on the site level and so on.
Some context
Recently I have been working on a complete rework of my side project
It is a rewrite of the application that was originally a single WebPart. It is no longer the case, it is now a standalone modern application and I wanted to include some features that need some consistency and make some assumptions on the context in which the application is executed. Concretely, it means that it is installed as a dedicated site collection (a modern communication site) with its home page being the SPFx app part page. It relies on some dedicated document libraries (only one currently to store the site designs preview images). To be as consistent as possible, I wanted the application not to be available as a WebPart or an app part page on any other site. It means I have to hide it from toolbox and deploy it programmatically on a modern page which I change the layout. Moreover to be able to grant and revoke permissions through the Site Designs REST API in a user friendly way, I needed to implement a custom people picker that needs a Microsoft Graph permission. If you follow me it means that... to install the application we need the following steps:
- Create a modern communication site
- Create a library in it to store site designs preview images.
- Upload and deploy the SPFx application in the app catalog
- Approve the Microsoft Graph permission
- Add the page programmatically to the new site
- Add the instance of the application to the page
- Change the layout of the page
Well... that can easily be done from a PnP PowerShell or Office 365 CLI script. But it means some code to maintain and a set of files that need to be shipped altogether. Moreover, it means extra overhead to handle "partial" setup or update matters !
An application package
In the good old days of Farm Trusted solutions (hmmm... no :D), we used to basically have 1 single package to ship (in most scenarios) that could have all needed assets included with the DLLs, various assets and artifacts XML definitions using the Feature Framework. It's no longer the case with SharePoint Online*, we have now SPFx packages (.sppkg) that can contain the JS code and some assets but not much more. * to be accurate, declarative XML for SharePoint artifacts are still supported even in SPFx packages. I avoid that as much as possible because it's quite limited and still have the good old limitations of Feature Framework (Try to update artifacts, you'll realize :D) So WSPs had some con's and used to bring annoying challenges, but still, I liked the concept of one single distributable package.
A bit of History...
For the past 4-5 years, the PnP initiative has built an open-source and community driven software called the PnP provisioning engine that allow to provision basically EVERYTHING in SharePoint using a declarative template formatted as XML (JSON is also supported, but I think I never seen any template in JSON so far :D), from a conceptual perspective, it looks pretty similar to what we were used to back then with WSPs and definitions XML and CAML and all. From a technical perspective, however, it is totally different because it uses remote APIs. It means 2 things :
- It is available for SharePoint On Prem and SharePoint Online
- The engine basically does, programmatically, what we can do manually from the user interface. it blows up the need of complex base templates and dependencies on the target site
For many years, the PnP provisioning engine allows you to create a definition of all the changes you want to apply to a SharePoint site collection. Moreover, you can update and reapply the same template to the same target and it will apply, on its own, only the latest changes (with some exceptions...). You can extract (and then apply) templates with the PnP engine as XML ! It's an awesome capability to import and export sites, it can even be used for data migration with a bit "extra" work. Wait... there's even better! If you specify the output to have a ".pnp" file extension, it will actually extract the definition and all referenced assets in a ZIP archive (an OpenXml format file to be exact). The engine is actually implemented in the PnP Core library, it means you can use it directly in your own .NET application. It is also wrapped in the PnP PowerShell commands set meaning you can simply install those cmdlets and leverage all the power of the engine.
A tenant-wide package
Since 2018 (I can't remember exactly when it was realeased), the PnP engine not only supports site collection templates, but also templates that can be used against the whole tenant in SharePoint Online Microsoft 365. That's right, you can now, with a single template, provision entire site collections, and apply template to each of them ! The schema is actually already written in a way that it (or will) supports many of the software across Microsoft 365 (SharePoint, Teams, OneDrive, Azure AD). We have to take care that, to apply such tenant, the current credentials must have the sufficient privileges on the tenant (e.g. SharePoint global administrator).
My solution distributable package
PnP tenant template allowed me to basically write declaratively all the steps of my setup procedure in a single XML file. You can have a look at the entire file here. Let's see each of the steps in the PnP declarative way
- Create a modern communication site
  <pnp:Sequence ID="MAIN-SEQUENCE">
        <pnp:SiteCollections>
            <pnp:SiteCollection xmlns:xsi="http://www.w3.org/2001/XMLSchema-instance" xsi:type="pnp:CommunicationSite" ProvisioningId="SDSV2.SITE" Url="https://{parameter:TenantName}.sharepoint.com/sites/{parameter:SitePath}" Title="Site Designs Studio" Owner="{currentuserloginname}" Description="{parameter:Description}" Language="{parameter:lcid}">
                <pnp:Templates>
                    <pnp:ProvisioningTemplateReference ID="SITE-DESIGNS-STUDIO-V2-APP"/>
                </pnp:Templates>
            </pnp:SiteCollection>
        </pnp:SiteCollections>
    </pnp:Sequence>
- Create a library in it to store site designs preview images.
  <pnp:Lists>
      <pnp:ListInstance Title="Site Design - Preview Images" Description="A library to store the Site Designs preview images" DocumentTemplate="{site}/SiteDesignPreviewImages/Forms/template.dotx" TemplateType="101" Url="SiteDesignPreviewImages" EnableVersioning="true" MinorVersionLimit="0" MaxVersionLimit="500" DraftVersionVisibility="0" TemplateFeatureID="00bfea71-e717-4e80-aa17-d0c71b360101" EnableAttachments="false" DefaultDisplayFormUrl="{site}/SiteDesignPreviewImages/Forms/DispForm.aspx" DefaultEditFormUrl="{site}/SiteDesignPreviewImages/Forms/EditForm.aspx" DefaultNewFormUrl="{site}/SiteDesignPreviewImages/Forms/Upload.aspx" ImageUrl="/_layouts/15/images/itdl.png?rev=47" IrmExpire="false" IrmReject="false" IsApplicationList="false" ValidationFormula="" ValidationMessage="">
      <!-- content removed for brevity -->
          <pnp:Security>
              <pnp:BreakRoleInheritance CopyRoleAssignments="false" ClearSubscopes="false">
                  <pnp:RoleAssignment Principal="{associatedmembergroupid}" RoleDefinition="Contribute"/>
                  <pnp:RoleAssignment Principal="c:0-.f|rolemanager|spo-grid-all-users/{parameter:TenantId}" RoleDefinition="Read"/>
              </pnp:BreakRoleInheritance>
          </pnp:Security>
      </pnp:ListInstance>
    </pnp:Lists>
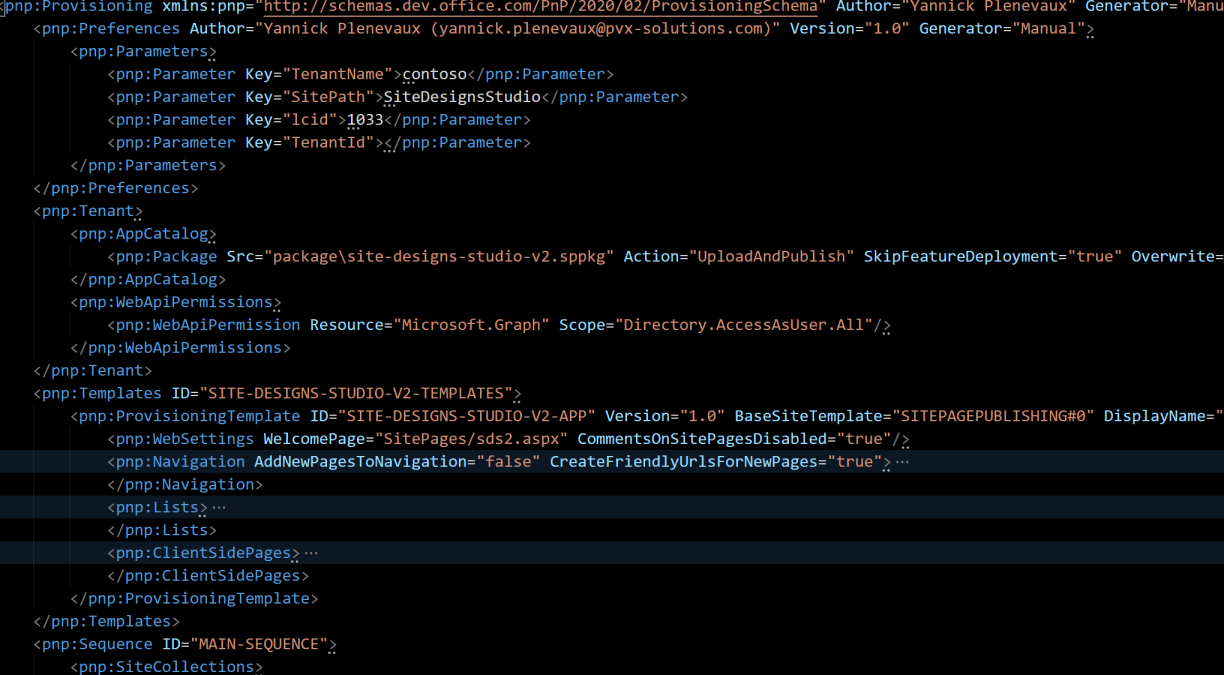
- Upload and deploy the SPFx application in the app catalog (Note the Src attribute of the <pnp:Package element, it refers to a relative path on the current file system!)
  <pnp:Tenant>
    <pnp:AppCatalog>
        <pnp:Package Src="package\site-designs-studio-v2.sppkg" Action="UploadAndPublish" SkipFeatureDeployment="true" Overwrite="true"/>
    </pnp:AppCatalog>
  </pnp:Tenant>
- Approve the Microsoft Graph permission
  <pnp:Tenant>
    <pnp:WebApiPermissions>
        <pnp:WebApiPermission Resource="Microsoft.Graph" Scope="Directory.AccessAsUser.All"/>
    </pnp:WebApiPermissions>
  </pnp:Tenant>
- Add the page programmatically to the new site
- Add the instance of the application to the page
- Change the layout of the page
<pnp:ClientSidePages>
<pnp:ClientSidePage PromoteAsNewsArticle="false" PromoteAsTemplate="false" Overwrite="true" Layout="SingleWebPartAppPage" Title="Site Design Studio" ThumbnailUrl="" PageName="sds2.aspx">
<pnp:Header Type="Default" LayoutType="FullWidthImage" TextAlignment="Center" ShowTopicHeader="false" ShowPublishDate="false" TopicHeader="" AlternativeText="" Authors="" AuthorByLineId="-1"/>
<pnp:Sections>
<pnp:Section Order="1" Type="OneColumn">
<pnp:Controls>
<pnp:CanvasControl WebPartType="Custom" JsonControlData="{"id": "e164cc97-dcae-4a4e-a899-67ebb916207e", "instanceId": "c2a07e0a-2080-4912-a065-e957377cbc3b", "title": "Site Designs Studio", "description": "The Site Designs Studio allows SharePoint power users to manage, create and edit Site Designs and Site Scripts", "dataVersion": "2.0", "properties": {"description":"Site Designs Studio"}, "serverProcessedContent": {"htmlStrings":{},"searchablePlainTexts":{},"imageSources":{},"links":{}}, "dynamicDataPaths": {}, "dynamicDataValues": {}}" ControlId="e164cc97-dcae-4a4e-a899-67ebb916207e" Order="1"/>
</pnp:Controls>
</pnp:Section>
</pnp:Sections>
</pnp:ClientSidePage>
</pnp:ClientSidePages>
Note the Layout attribute of the ClientSidePage, the ControlId of the CanvasControl
Okay ! I have all my customizations declared ! But I have only an XML file so far, the SPFx package is still a separate file! I want a single distributable package file. Let's create one ! With the PnP cmdlets, I can easily do that ! First of all I need to load the template in memory with the following command
# Make sure all relative paths mentioned in the XML are valid related to the location of the XML file
$pnpTemplate = Read-PnPTenantTemplate -Path myTemplate.xml
# If the XML is invalid, you will have an error here
# Read-PnPTenantTemplate : The element 'AppCatalog' in namespace 'http://schemas.dev.office.com/PnP/2020/02/ProvisioningSchema' cannot contain text. List of possible
# elements expected: 'Package' in namespace 'http://schemas.dev.office.com/PnP/2020/02/ProvisioningSchema'.
# At line:1 char:16
# + $pnpTemplate = Read-PnPTenantTemplate -Path myTemplate.xml
# +                ~~~~~~~~~~~~~~~~~~~~~~~~~~~~~~~~~~~~~~~~~~~
#     + CategoryInfo          : SyntaxError: (:) [Read-PnPTenantTemplate], XmlSchemaValidationException
#     + FullyQualifiedErrorId : TEMPLATENOTVALID,SharePointPnP.PowerShell.Commands.Provisioning.Tenant.ReadTenantTemplate
# If the XML is valid, the $pnpTemplate contain the template object
###################################################################
# $pnpTemplate
# Parameters           : {[TenantName, contoso], [SitePath, SiteDesignsStudio], [lcid, 1033], [TenantId, ]}
# Localizations        : {}
# Tenant               : OfficeDevPnP.Core.Framework.Provisioning.Model.ProvisioningTenant
# Version              : 0
# Author               : Yannick Plenevaux
# Generator            : Manual
# Description          : A Tenant template to install Site Designs Studio V2 solution
# DisplayName          : Site Designs Studio V2
# ImagePreviewUrl      :
# Connector            : OfficeDevPnP.Core.Framework.Provisioning.Connectors.FileSystemConnector
# Templates            : {SITE-DESIGNS-STUDIO-V2-APP}
# Sequences            : {MAIN-SEQUENCE}
# Teams                : OfficeDevPnP.Core.Framework.Provisioning.Model.Teams.ProvisioningTeams
# AzureActiveDirectory : OfficeDevPnP.Core.Framework.Provisioning.Model.AzureActiveDirectory.ProvisioningAzureActiveDirectory
# Drive                : OfficeDevPnP.Core.Framework.Provisioning.Model.Drive.Drive
# ProvisioningWebhooks : {}

Save-PnPTenantTemplate -Template $pnpTemplate -Out myPackage.pnp
After executing this script, the myPackage.pnp is generated, (if you change its extension to .zip, you will be able to explore it easily, and realize it contains indeed our template XML file as well as our .sppkg file.
That's it ! We have now a standalone distributable package to deploy solutions to Microsoft 365 and SharePoint Online ! To apply the tenant template package to your tenant, use the simple commands below
# Connect to your tenant if not already done
Connect-PnPOnline https://contoso.sharepoint.com
Apply-PnPTenantTemplate -Path .\myTemplate.pnp
You might want to ship along with the .pnp file the commands above in a PowerShell script file with some relevant default parameters, but it is not at all a requirement !
I hope you found this post interesting, feel free to reach out with some feedback or questions !
Cheers !
Yannick